Why?
Because that original article was written over 1.5 years ago. For me, 3 months is a lifetime. Looking at the work I was doing 1.5 years ago makes me shudder. Let me show you what I mean...
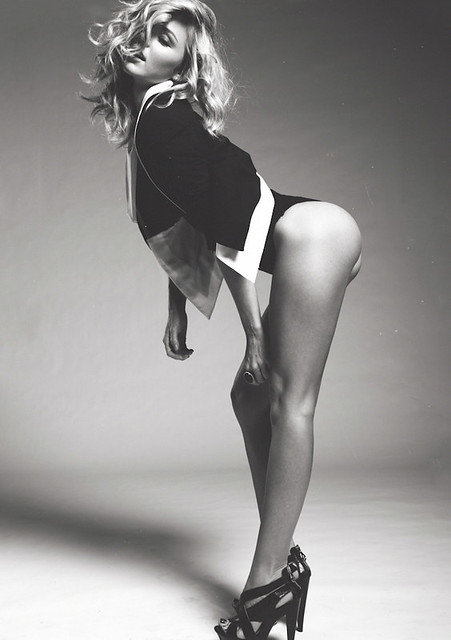
Alex. My first test with FORD Models
Ugh. This is why I have to rewrite the article. I also need to update the original lighting diagram and update with new pictures.
Here's the revised lighting diagram courtesy of www.lightingdiagrams.com. Well, kinda. I took pieces from the online lighting diagram creator (OLDC) and Photoshopped them because the OLDC didn't give me enough space to represent the relevant distances I use in my one-light setups. I've drawn this model to scale to the best of my ability so the relevant distances are what I use for this setup.

Now for my disclaimer: This is my 1-light setup on white seamless paper. It's not the only way to use a 1-light setup. In fact, it's not even the only way to use a single light on white seamless paper. There are probably billions of combinations between lights, lighting modifiers, backdrops, distances, camera settings, etc. If you can suffer through the fact that this is totally subjective, here's my setup and why it works for me!
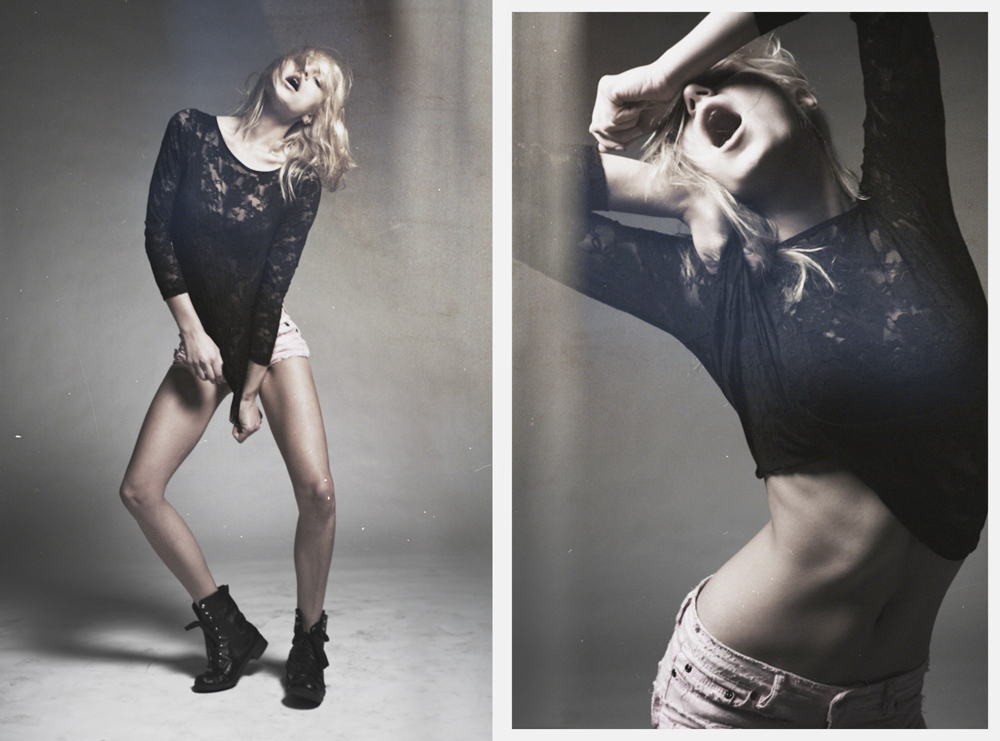
Here's the one-light setup result that we'll be reverse engineering.

First off, you should probably start with clean white seamless paper. This is a case of "do as I say, not as I do" because as you can see, my seamless paper is "well-trodden". Actually, "well-trodden" would be an upgrade to what I'm working with! But if you take care of your white paper it will take care of you and save you lots of time in Photoshop. For example, if you leave your paper out, humidity can cause the paper to wrinkle over time. This happens regularly to my paper. You'd think that discovering this little nugget of knowledge would change the way I treat my paper...
Nope.
So, take care of your paper :)
Onto the specifics. My one-light white seamless setup is "designed" to keep things simple yet flexible, while providing an "interesting background". Basically it's a setup designed to remove as many variables as possible while giving the model plenty of range of motion to move... all while creating an austere yet dynamic backdrop to showcase the model.
This is usually the first lighting setup that I shoot for model tests. By keeping things simple I get to focus on the model and evoking emotion/motion out of her. So there are functional reasons behind the simplicity of this setup.
But with simplicity comes certain limitations. As you can see in the diagram, I use a single light to light the model (from head-to-toe) and also light the backdrop. Merely spilling light onto white seamless paper usually creates flat evenly lit backdrops, so I need to somehow shape the spill to create the illusion of depth. That's a lot to ask out of a single light and some white seamless paper.
So what modifiers and distances do I use?
I normally use a medium-sized octabox with a 40º grid. But you can do this with almost any gridded light modifier. I've used modifiers from a 22" beauty dish to a 7' octabox with the few differences being power, lighting distance-to-model, and lighting distance-to-backround. Basically by making a few adjustments, you can replicate the same result with different modifiers. The key is that the modifier needs to be gridded to control spill. This is how you generate the gradient of light on the backdrop.
How many degrees worth of spread should the grid provide? That depends on the size of your modifier, how much space you have in your studio, and how your lighting distance-to-backdrop. What I can tell you is that I've used a 40º grid on my 22" beauty dish, a 40º grid on my 35" octabox, and an unknown grid (probably 60º) on my 7' octabox and I can still get roughly the same results. The parameters are to choose a grid wide enough to light the model head-to-toe (from a reasonable distance) but narrow enough to control the spill onto your background. Be sure to experiment with what you've got before running out to buy a new modifier/grid setup. Chances are you can do this with many modifiers as long as it is gridded!
With my 35' octabox, I place the the light about 8-10' away from the model about 30-45º above and 30-45º to the right/left. Then I fine tune the light to give me the basic Rembrandt lighting pattern. Why this range of angles? Because it's not a formula. I don't know how the model's face will respond to the light at exact angles. You have to play around with it to find the right angles. Every face is different. And that's not even considering her posing angles once she starts moving!
Also with my 35" softbox, I can roughly light the model from head-to-toe without much falloff as long as I am feathering the light in front of her. Feathering the light is probably the most important piece to the setup because it allows me to light an entire model with a single (somewhat small) gridded light. Feathering the light in front of the model also serves the purpose of minimizing spill onto the backdrop and creating a darker backdrop.
And my diagram reflects this feathering. I know it looks like I just slapped it together but I took great care to draw the distances to scale! Instead of blasting the light directly at the model's I've feathered the center of the light about an arm's length (2-3') in front of the model about waist-to-chest high. I know you can't see vertical distances in the diagram but trust me, putting the center of the light waist-to-chest high is important. Even if you feather the light 2-3' in front of the model but point it head high, you'll get nasty exposure fall off towards the legs. The center of the light should be about chest-high because it creates better head-to-toe exposure as the light drops off away from the center. Does this make the model's chest over-exposed compared to the legs? Maybe. So if you find that you're metering more than 1/2 stop difference from anywhere from head-to-toe you should back the light away from the model and find a feathered distance that creates a more even exposure head-to-toe.
Now about that backdrop. I use a lot of "sweep" (paper length) because that provides ample distance between the model/light and the backdrop to create a dynamic gradient of grey. Not enough sweep and too much light spills on to the paper and turns it into a flat white backdrop. Too much sweep and the white paper looks pitch black (plus you'll run into problems where the model is no longer "covered" by the paper). In my experience, I'm looking at rolling out about 25' of seamless (12' in the air and 13' on the ground). Why not just use grey seamless paper instead? Because grey lights flatter. White gives you a more dynamic gradient when you feather light across it. But the benefit to grey is that you won't need as much sweep to keep the background dark (since it absorbs more light). This means you can save paper (money) and use less space (also money if you rent a studio).
And if I've done a good job drawing the diagram to scale, it means that my model is standing 10-12' away from the back of the white seamless paper. Again this depends on your power settings, light modifier, and lighting distance-from-model. You might have to play around with the model's/light's distance from the backdrop in order to create that dynamic gradient on the white backdrop.
Once you've set the backdrop, model and the light it's time to start experimenting. A good rule of thumb is to shoot at your shutter sync speed to minimize ambient light from exposure compensation. Usual studio apertures are longer depths-of-field that generate maximum sharpness, like f/11 to f/16 (if you have the lighting power to push those f-stops). Most photographers elect to shoot at their base ISO for maximum dynamic range and overall image quality.
But beyond the basic setup there are many other considerations. Which lights to use, focal lengths, shooting angles/heights, how to keep your models flowing through their poses and more! I strongly encourage you to experiment with this very basic setup and play around with different camera settings, distances, focal lengths, shooting angles, etc. Hopefully you'll find that this is a simple yet flexible lighting setup that frees the photographer to really focus on model interaction while creating images that don't look like they were shot on a flat backdrop. Happy shooting!
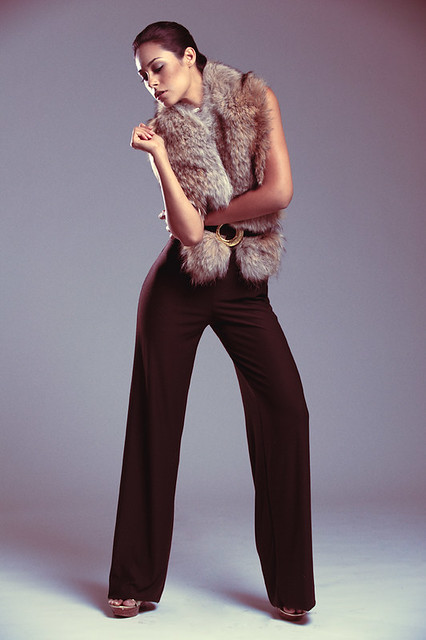
Here are a couple more examples of my work shot with this one-light setup!